If you just put a framed line around a photo it appears flat and in the distance, care therefore needs be taken to ensure the effect you are trying to obtain.
While I have much to learn, here are two examples I have been working on, trying to get this effect to work.
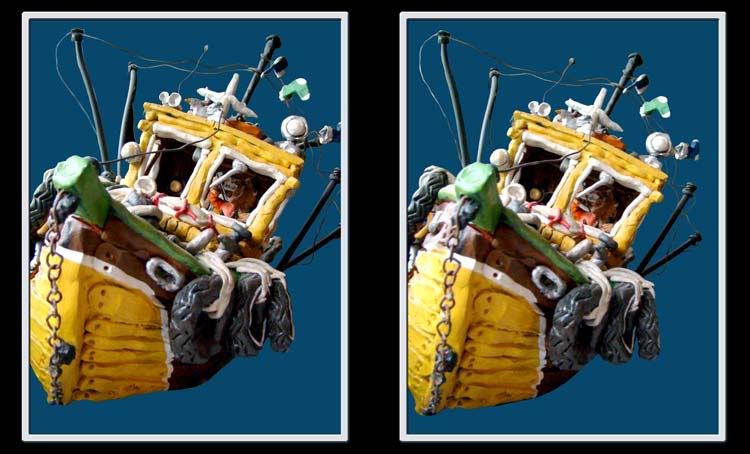
1. This photo has a standard "box" frame around it but if you look closely, the placement of the frame gives an exagerated effect of the bow of the tug proturding beyond (outside) the frame. Thus the frame is used to enhance the 3D effect.
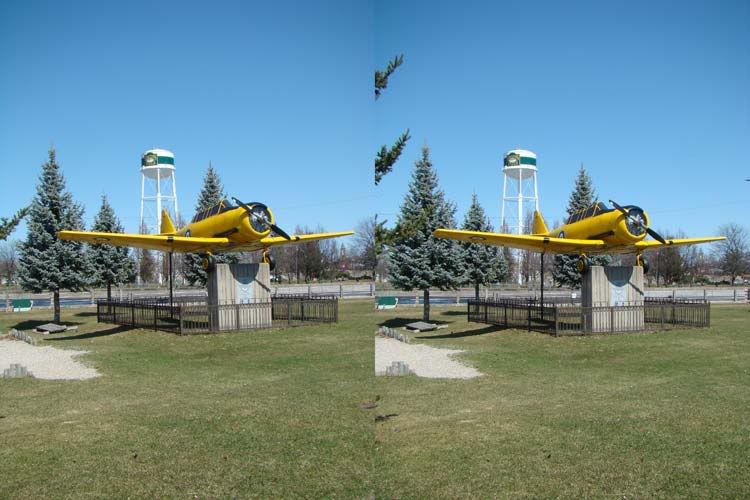
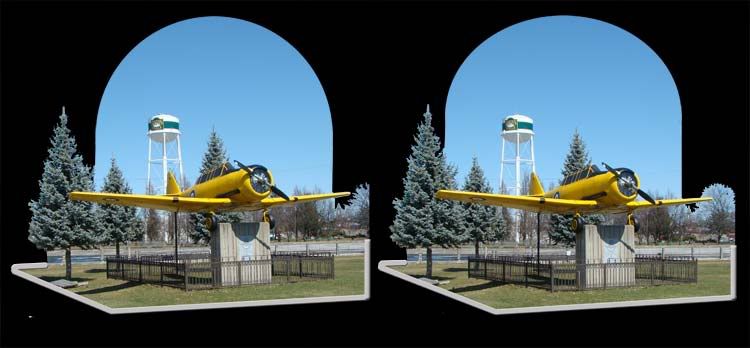
2. The next two photos are the same. The first is the original photo taken on site and the second is the "cutout" boarder to give a "modelling" effect to the image. While this is not necessarily the best photo to have used in this example it was the best I had at the time. Once I get this effect down properly, I will spend careful time finding more suitable photo shoots to best fit the borders.
Any feedback appreciated.
Beautiful pictures. Congratulations for the idea. I too take photos 3D (anaglyphs). I invite you to my page www.anaglify.online-pl.com
ReplyDeleteDariusz: Thanks for the comment. I visited your site and the others you link to. You have a much better talent at web design than I do. Your page looks great.
ReplyDeleteI chose "cross eye" 3D over anaglyphs because I wanted my visitors to see the 3D effect without need for glasses or such. I hope it was the right choice.
Nice to talk with you.